
In this article, you’ll find information on how to replace the old pickup selector switch in a Taylor Solidbody with a new one.
Taylor Solidbody Megaswitch-P wiring diagram (click image to download):

Your new pickup switching will be:
Position 1: Bridge Humbucker (bridge humbucker*)
Position 2: Outer coils in parallel (inner coils in series*)
Position 3: Inner coils in series (full neck with inner bridge coil*)
Position 4: Inner coils in parallel (inner coils in parallel*)
Position 5: Neck Humbucker (neck humbucker*)
*Old configuration in red italics.
List of items that you’ll need:
- Components
- Megaswitch-P
- 0.022mf capacitor
- 22 gauge wire, stranded
- Soldering
- Soldering iron
- Sponge
- Tip cleaner
- Solder
- Solder sucker
- Wire stripper
- Wire cutter
- Helping hands station
- Steel wool (the thick ribbon-y kind, not the shredded wheat kind)
- Heat shrink tubing
- Heat gun
- Multimeter
- General tools
- Phillips screwdriver
- Socket driver
- Sockets
- 2.5 mm allen wrench
- Needle nose pliers
- Dremel rotary tool with cutting wheel, or a good set of precise bolt cutters.
- Miscellaneous
- Towels
- Good lighting
- Magnifying glass
- Cups or bowls to store loose parts
Tips and pitfalls:
- This wiring diagram is for the double humbucker configurations only. I do not have a wiring diagram for the single coil configurations.
- Be sure that you have a good soldering iron and good soldering technique before you start. If not, you will have a great deal of difficulty completing this job.
- Clean all contacts before soldering, even the backs of the pots, or your connections will not be secure.
- The cavity in the back of the guitar is very small. To give yourself room to work, remove the pots and from the guitar and work outside the cavity.
- Use towels to cover up guitar’s surface to protect it from solder drips other dings.
- The mounting bracket that is mounted flush with the underside of the guitar (or pickguard for Classic models) is glued in place. This bracket can be removed with a bit of force. A careful, firm tug will separate it from the surface. You must remove this bracket so that you can remove the old switch and replace the new switch.
- You may have to extend the bridge ground wire, or replace it with a longer wire.
- The pickup wires are very, very thin. Be very careful stripping them. Cut them flush with the molex connector to maximize your length.
- The shielding wire (thick black in the diagram) is braided in an inconvenient way and will be unusable once it separated from the other wires (you’ll see what I mean). I cut down, twisted, tinned and coupled it with a new wire. Heat shrink the joint.
- The switch needs to be modified as shown so that it can fit onto the bracket. These cuts can be made with a sharp pair of wire cutters.


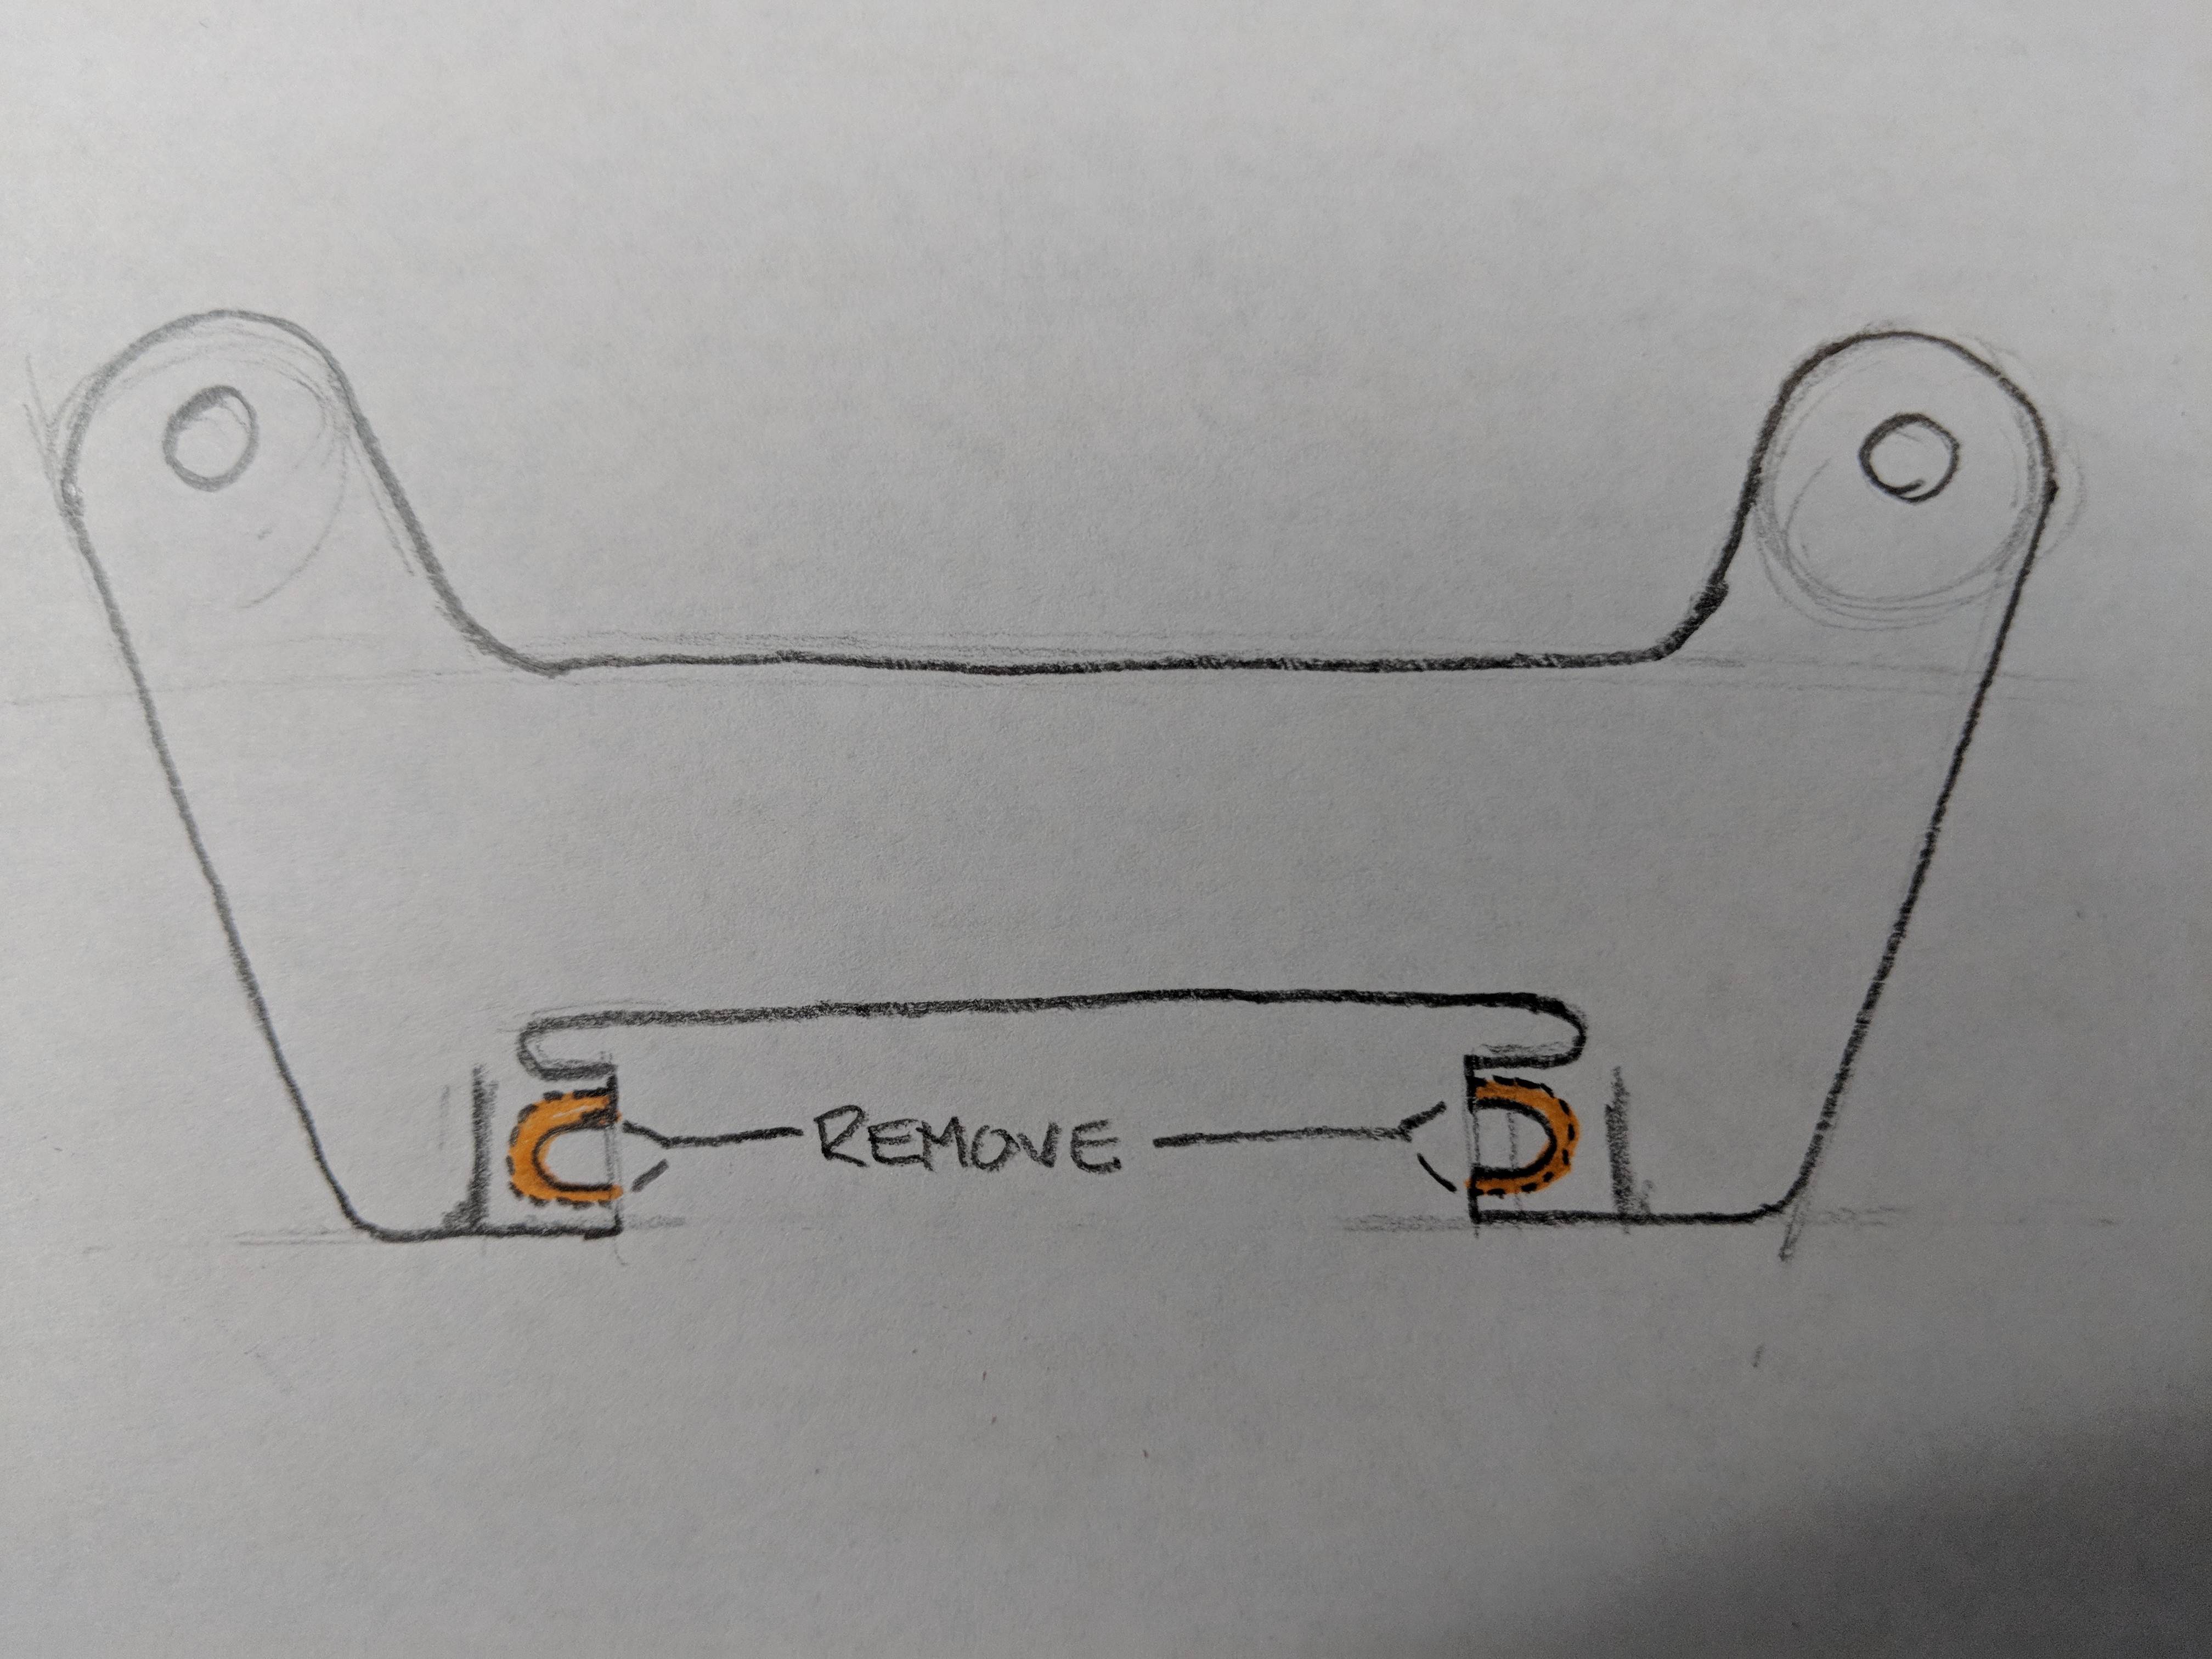
- The bracket has two C-shaped holes that need to be widened as shown to account for the new wider screws used for mounting the new switch to the bracket. A Dremel tool or a drill with an appropriate bit will do the job.
- The allen screws that held the old switch onto the bracket will not thread into the new switch because they are too small. The screws that came with the new switch have to be used, but they are much too long. They need to be cut to size with a Dremel tool that is fitted with a cutting wheel. Cut the screw so that it is flush to the switch.
- Check all of your connections before putting the guitar back together. If you are good with a multimeter, use that. Otherwise, plug in your guitar to an amp while the electronic guts are still outside of the guitar cavity. If something doesn’t sound right, you can troubleshoot and fix the problem without digging the electronics out of the cavity again.
I’m happy to answer questions, just comment below. I’m not an expert, just a guitar player who knows just enough to get things done. I may not be able to answer technical questions and I certainly won’t be able help with any deviations from the above wiring.
Best of luck to you!
For more information about me and the guitar lessons that I give in and around Baltimore, visit www.ewguitar.com.

Since this was posted a couple years ago, how has the switch aged and are there any recommendations that you have that you wish you had done? I’m about to do the conversion and really appreciate your help. I’m glad someone loves TSB guitars as much as I do.
Hi Josh. The only thing that I wish I had done differently was swap out the pickups while I was changing the switch. The Taylor HD pickups always suffered from strat-itis (that wolf-tone problem when the pickups are too close to the strings) even when the pickups were lowered completely. I have since swapped them out for Seymour Duncan Seth Lover PAF pickups and they sound great now. I posted a quick video on Facebook demonstrating the new pickups: https://www.facebook.com/ewguitarlessons/posts/2689006711185777
Thanks for reading the article. I hope it helps!
Thanks for supplying this information. It is very helpful. I really like the sound of those Seymour Duncan pickups you swapped in. I’ve been thinking about making a pickup change myself. I’m curious if you were able to keep the five distinct tones with the swap (1. Full Bridge, 2. Inside coils in series, 3. Neck humbucker plus inside coil of bridge, 4. Inside coils in parallel, 5. Full neck pickups)?
Thanks,
Travis